
Using the correct grit to sand a surface – start prepping to achieve your best work!
What grit to use when sanding..
When thinking of which sand paper is needed to prep a vehicle, we must know what’s to be achieved. Sanding is a critical step when painting a substrate of a vehicle. Personally, I take into consideration what the customer/client wants and how to best achieve that for them. Some individuals may choose to learn by experience and others through training and online DIY content. From applying a primer, all the way through the base and clear coat stages require various steps of sanding. When doing any sanding on a vehicle I recommend to use Dura-Block sand blocks. These blocks can help to prevent the micro waves in the ending products finishing reflection. Stiffer sand blocks are handy when working with Primers, and Soft blocks are best for later in prep processes.

When working with fillers following metal or plastic working, there is 3 main grits to use. These grits are 80,120, & 180 grits. G0 grit is used after applying first coat of filler. Guide coat can be applied as best indicator to know when it’s time for the next grit to be used. Another thin coat of filler if lows still present smoothing to even surface. Then 120 grit can be used to remove 80 grit parts, followed by 180. Each grit will remove previous grits sand scratches turning them more micro than last.
When using the blocks its best to sand at 45 degree angle in one direction. Then follow that movement blocking at 45 degree angle in opposite direction which creates a “X”. Sanding in one direction only can cause the surface to have waves later in paint reflection. When sanding by hand its critical to do so in multiple directions.
When its time for the feathering/blending…
Following the completion of body work one must feather those areas around repair area. Feathering/blending can be achieved by using 180 grit over repair, followed with 220-320 grit surrounding that area. This would be the case for Aluminum and high strength steels. But, in my experience when working with PP plastics 320 would be the best option the feather with. For plastics 220 would be applied over the repair area, and 320 around the edges to provide feathering. 220-320 grit then can be used to the rest of area to have primer surfacers applied.
In some cases when prepping for primer surfacers I’ve used only 180 grit. This was because the previous Acrylic paint job was so thick on surface that it acted as a primer surfacer. I still applied the primer after which allowed me to be able to deliver on a even smoother service. At this point we have gone through using 80,120, 180, 220, and 320 grits.
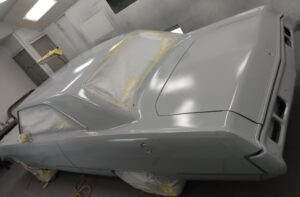
When it comes to Sanding Primer surfacers 320-400 grit would be best to use blocks. Hard sanding blocks can be utilized at this stage for the mirror finish of ending product. This step is crucial for a flat surface or invisible repair. Apply your guide coat. Starting with 320, use a hard block to sand the panel. The edges can be sanded using a red scotch pad to avoid cutting through. Followed with sanding primer after with 400 grit. The Corners of panel are then sanded with small block. If any areas are getting base and clear, than sand that area with 600 grit. Any areas only getting clear will be sanded with 800 grit. Now your ready to add a Primer sealer, base coat, and clear coat. To read more posts like this visit F&G Blogs for latest blogs.
Did these tips help you achieve a desired paint job? Let us know how this post helped you with sanding and the grits that you used in the past.
If your are still interested in learning more visit, Sandman for more information.